
Lorax Paper Plate Craft


Hi everyone! It’s Stacey from Glued To My Crafts again! Did you catch my first contributor post last month? If not – head on over HERE to check it out! {It’s Swan-tastic!}
Since Dr. Seuss’ birthday is right around the corner {March 2nd} I thought it would be fitting to share a Dr Seuss themed craft this month. As always – this craft has simple supplies and is easy for children of all ages. Plus it takes less than an hour from start to finish. Perfect for those afternoons where you just NEED something to keep the kids busy.
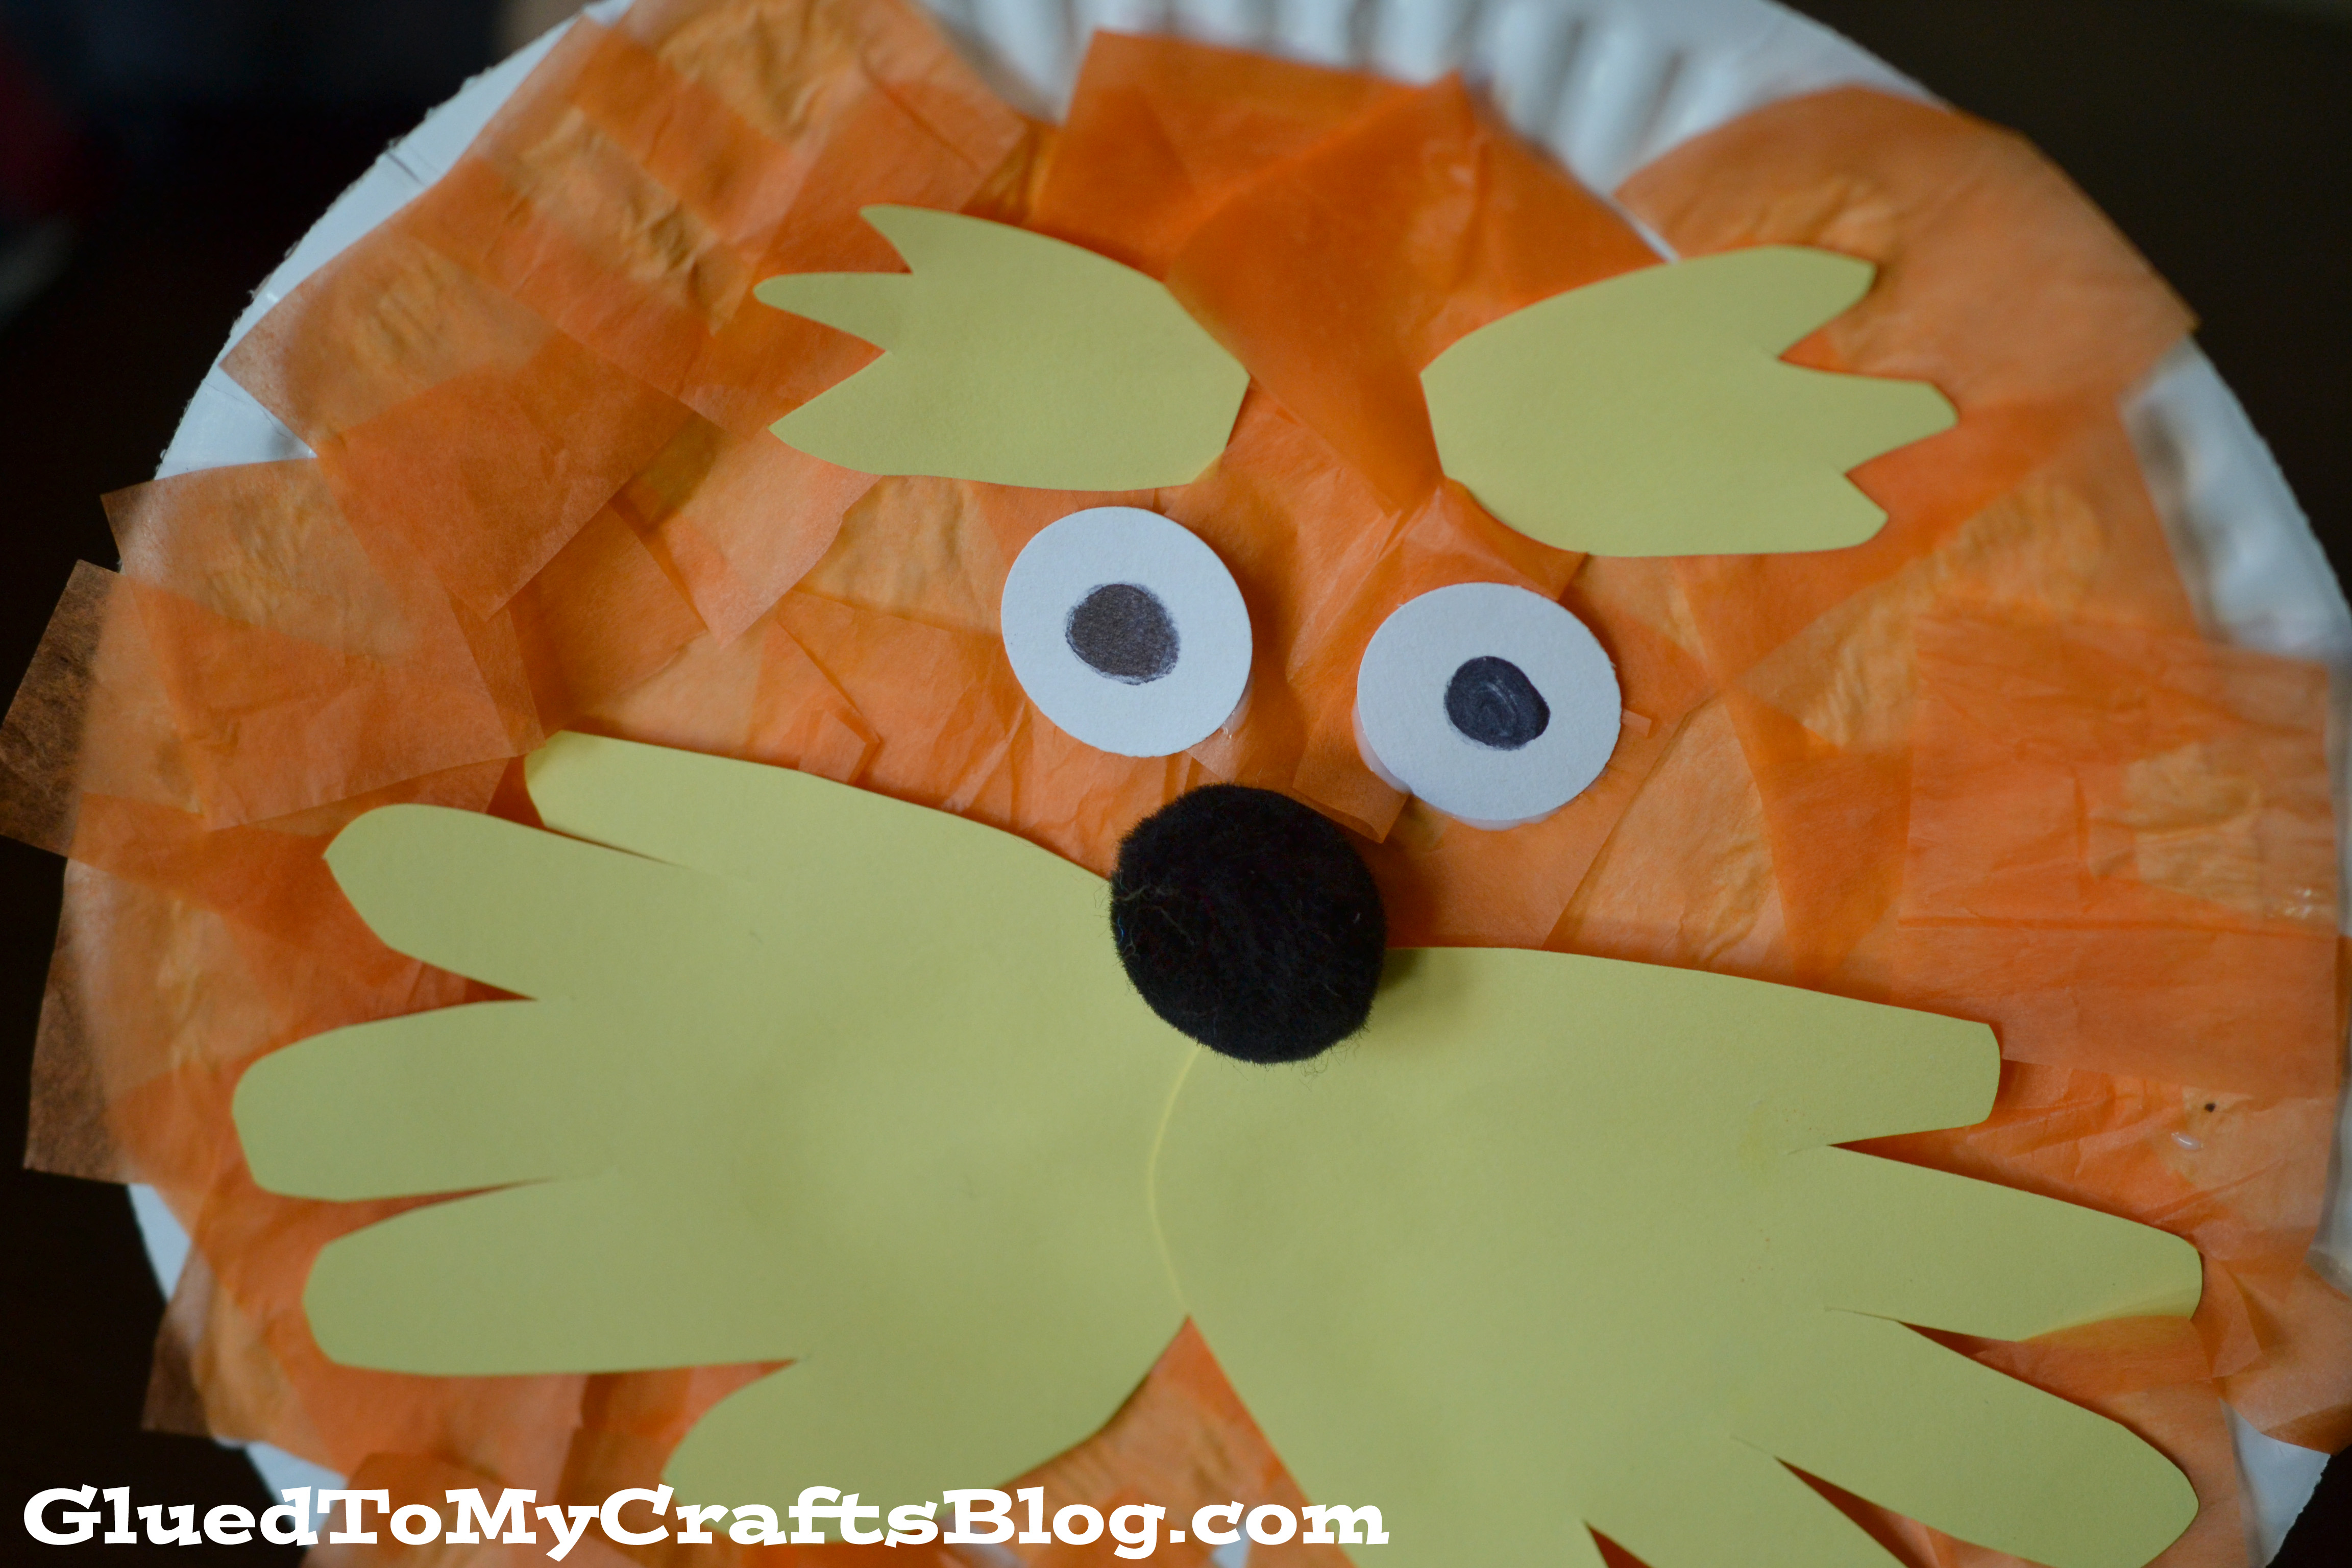
The book that inspired this craft is The Lorax. It’s by far – one of our favorites and we watch the movie several times a month. Although the Lorax is portrayed as grumpy in the book/movie – he’s really charming in this craft. Promise!

What you’ll need:
- Paper Plate
- Orange Tissue Paper {or orange construction paper}
- School Glue
- Yellow & White Cardstock
- Small Black Pom Pom
- Pen/Sharpie
- Scissors
- Circle Punch
- Cute kids with hands


And the steps:
- First cut/tear your orange tissue paper into small squares. {If you don’t have tissue paper, construction paper works well too}
- Next slather glue all over the paper plate. Place the tissue paper and paper plate in front of your child. Ask them to cover the entire plate with the tissue paper. Once completely covered, set aside to let it dry.
- Now comes the fun – making the handprint cutouts. Have your child place their hands on the yellow cardstock. Trace their hands and cut out the handprints. With the left over cardstock, cut out two pieces for the eyebrows of the Lorax. With the white cardstock, punch/cut out two circles for the eyes and add a dot in the center for the pupil.
- To finish the craft, glue all the pieces onto the tissue paper covered plate. The handprints will be the mustache of the Lorax, while the black pom pom will be the nose and the smaller yellow cutouts the eyebrows. And you are done! Display proudly!

This Lorax Paper Plate Craft is super easy and I promise, a TON of fun!
So what crafts are you planning on doing in celebration of Dr. Seuss’ birthday? I hope the one I shared today is on the list!

If you LOVE this Dr. Seuss project, check out MORE here:

sharing at show and tell, link party palooza, the 36th avenue, tidy mom, tip junkie

This lorax is so cute! What a fun project
This is sooo cute!! Love the use of the hands!
This totally made me smile! Great project!
I love this! Such a fun craft for kids to do!